I still remember staring at my kitchen cabinets last spring. They were solid wood, perfectly functional, but the dated brass knobs made the whole room feel stuck in 1995. I didn’t have the budget—or the patience—for a full remodel. Then a designer friend mentioned something that changed everything: “Swap the hardware first. You’ll be shocked.”
She was right.
Updating cabinet hardware is the fastest, most affordable way to refresh your kitchen, bathroom, or even a tired dresser. It’s a beginner-friendly project that can be done in an afternoon, often for less than the cost of a nice dinner out. I’ve now done it in two homes, and each time it felt like I’d walked into a new room.
If your cabinets are structurally sound but visually dragging down the space, this guide will walk you through everything I’ve learned—from choosing the right hardware to installing it without damaging your cabinets.
Why Hardware Makes Such a Big Difference
Cabinet hardware is like jewelry for a room. It’s small, but it draws the eye. Replace cheap, worn-out knobs with modern pulls, and suddenly the cabinets look intentional. The finish you choose can shift the entire style of the kitchen: matte black for modern farmhouse, brushed nickel for timeless, brass for warmth.
The other reason this upgrade works so hard: it’s extremely approachable. You don’t need to be handy. You need a screwdriver, maybe a drill, and the willingness to fill a couple of old holes. I’m not a professional, and I managed it in about two hours, including a coffee break.
First, Choose the Right Hardware
Before you touch a screwdriver, spend a little time on selection. The wrong hardware can feel like new jewelry on an outfit that doesn’t match.
Knobs vs. Pulls
Knobs are single-point mounts, usually round or square. They’re classic and work well on doors. Pulls (also called handles) have two mounting points and can feel more contemporary. There’s no strict rule, but here’s what I follow:
- Use knobs on upper cabinet doors for a light, uncluttered look.
- Use pulls on drawers—they offer a better grip, especially for heavy ones.
- Mixing both in the same kitchen is completely acceptable; just keep the finish consistent.
Getting the Finish Right
The finish ties everything together. I’ve made the mistake of buying polished chrome pulls for a kitchen with warm wood tones—it clashed badly. Now I match undertones: warm metals (brass, gold, oil-rubbed bronze) with warm woods; cool metals (nickel, chrome) with white, gray, or cool-stained cabinets.
If you’re unsure, brushed nickel and matte black are the safest bets. They blend with almost everything.
Measure Before You Buy
This is where I stumbled the first time. Most existing knobs use a single hole. If you’re switching to pulls, you’ll likely need two holes. The distance between those holes—called the center-to-center measurement—must match the new pull. Common sizes are 3 inches, 3.75 inches, and 5 inches. Don’t guess; remove one pull and measure from the center of one screw to the other. If you’re changing knobs to pulls and need to drill new holes, that’s doable, but it’s an extra step I’ll cover below.
Tools and Materials You’ll Need
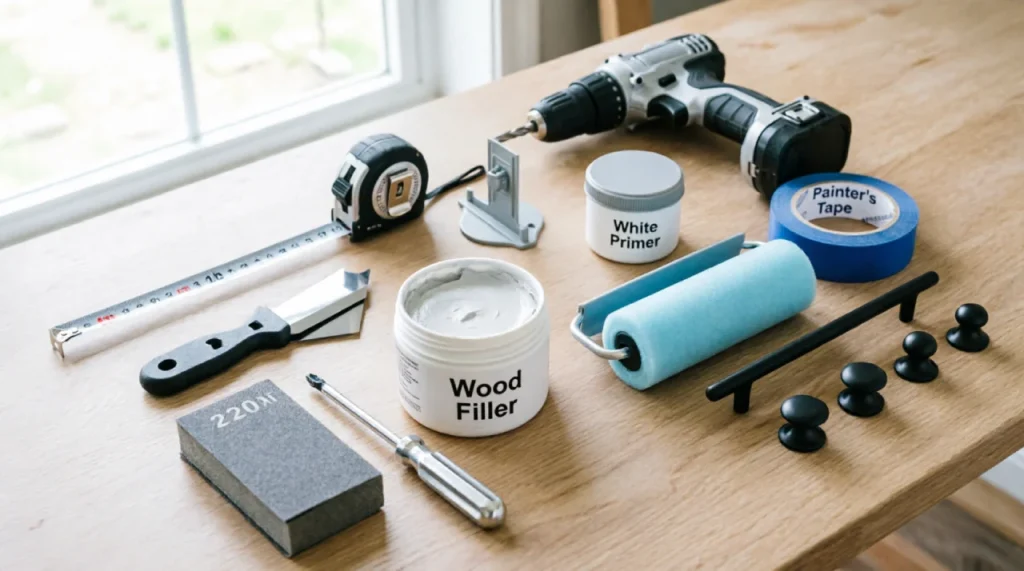
Gather everything before you start. I always think I can wing it, and I always end up rummaging through a drawer mid-project.
- A Phillips or flathead screwdriver (match your screws)
- Wood filler or wood putty (if filling old holes)
- A putty knife
- 220-grit sanding block or sandpaper
- Primer and paint (if filling and touching up)
- A small foam roller or brush
- Painter’s tape
- A drill with bits the same diameter as your screws
- A tape measure
- A cabinet hardware jig (optional but a lifesaver for accuracy)
- Your new hardware and the screws it came with
Step-by-Step: How I Updated My Cabinet Hardware
I’ll walk you through exactly what I did. The process changes slightly depending on whether your new hardware uses the same holes, but I’ll cover both scenarios.
1. Remove the Old Hardware
Use your screwdriver to loosen the screws from the inside of the door or drawer. Hold the knob or pull with your other hand so it doesn’t spin. Put all the old hardware into a bag—you might want to reuse it elsewhere or reinstall it if you move.
2. Fill the Old Holes (If Needed)
If you’re lucky, the new hardware lines up with the existing holes. But if you’re changing knobs to pulls or adjusting spacing, you’ll have empty holes.
Squeeze wood filler into the hole, pressing firmly with your finger so it fills completely. Use a putty knife to level it off. Overfill slightly—you can sand it flush later. Let it dry per the product’s instructions, usually several hours or overnight. I’m impatient, so I learned the hard way that sanding too soon just smears it.
Once dry, sand the area with 220-grit sandpaper until smooth and flush. Wipe away dust with a damp cloth.
3. Prime and Paint the Filled Areas
I once skipped priming, and within a month the filler’s color bled through my white paint. Now I always apply a thin coat of primer over the filled spots. Use a small foam roller for a smooth finish. Let it dry for an hour, then follow with a coat of matching cabinet paint. If the original paint was old, this is also a good time to touch up any other nicks.
Allow the paint to dry at least 24 hours before drilling or installing anything. Trust me, mounting hardware on tacky paint leads to peeling.
4. Mark New Hole Positions
If you’re drilling fresh holes, precise measurement is everything. I use painter’s tape on the cabinet surface to mark positions without leaving pencil marks.
For door knobs, the sweet spot is usually 2½ to 3 inches from the lower corner (on upper cabinets) or upper corner (on base cabinets). For drawers, center the pull horizontally. If the drawer is wider than 24 inches, two knobs or pulls spaced evenly across the front can look more balanced.
A cabinet hardware jig clamps onto the door or drawer and gives you exactly spaced holes. I bought a $15 jig, and it paid for itself in saved frustration. If you don’t have one, use a ruler and a level.
5. Drill Carefully
Use a drill bit sized to match the screws that came with your hardware. Drill from the front face through to the back. Apply gentle, steady pressure. Pro tip: place a piece of scrap wood behind the cabinet face to prevent blowout on the back side.
Blow away dust and remove the tape.
6. Attach the New Hardware
Insert the screw through the back of the door or drawer, thread it into the new knob or pull, and tighten with a screwdriver. Don’t overtighten—you can crack the paint or even strip the hole. Stop as soon as it feels snug.
Step back after the first one and check the alignment before doing the rest.
Common Mistakes to Avoid (I’ve Made Them All)
Even a simple project has pitfalls. Here’s what I wish I’d known:
- Forgetting to check screw length. New hardware often comes with screws that are too long or too short. Test fit one piece before doing all of them. If the screw protrudes too far, you can get shorter ones at the hardware store.
- Not matching the finish across the room. The drawer pulls, cabinet knobs, and even light fixtures don’t need to match exactly, but they should belong to the same family. Mixing polished brass with oil-rubbed bronze can look chaotic.
- Skipping the jig. Eyeballing holes almost always leads to crooked pulls. The jig ensures uniformity.
- Drilling without a depth stop. If your cabinets are thin, you risk drilling straight through. Use tape on the drill bit to mark the depth.
- Rushing the drying time. Wood filler and paint need patience. If you rush, you’ll sand wet filler or smear paint, which looks messy forever.
Renter-Friendly Hardware Swap
If you’re renting and can’t make permanent changes, you can still upgrade. I did this in my last apartment. Keep the original hardware in a labeled bag. Swap in your own knobs or pulls, and when you move out, simply reinstall the originals. As long as you don’t drill new holes, the landlord will never know. Just make sure the new hardware uses the same hole spacing.
A Note on Quality and Budget
You don’t have to spend a fortune. I’ve found beautiful solid brass pulls for $4 each online, and big-box stores sell packs of 10 for under $30. Avoid the cheapest pot metal options—they can bend or tarnish quickly. Look for hardware with a warranty or a reputable brand’s name. Real metal feels heavy and cool to the touch; lightweight plastic won’t last.
If you’re on a very tight budget, even a coat of spray paint on existing hardware can work temporarily, but I’ve found it chips within a year, especially on high-use drawers. Starting fresh is better.
Frequently Asked Questions
Can I mix knobs and pulls in the same kitchen?
Absolutely. In fact, many designers do exactly that—knobs on doors, pulls on drawers. Just keep the finish consistent so the look is cohesive.
What if my new hardware doesn’t cover the old hole?
If the old hole is visible outside the new pull’s footprint, you’ll need to fill, sand, and paint it. Small touch-ups can blend well if you have the original paint.
Do I need a drill?
Only if you’re changing hole positions or switching from single-hole knobs to two-hole pulls. If your new hardware matches the existing holes, a screwdriver is all you need.
How long does the whole project take?
For a typical kitchen with 15–20 doors and drawers, expect 2–3 hours if you’re not filling and painting holes. Add a day if you need to fill, prime, and paint.
Can I update hardware on laminate cabinets?
Yes, but drill carefully—laminate can chip. Use a sharp drill bit, go slowly, and tape the surface before drilling to prevent cracking.
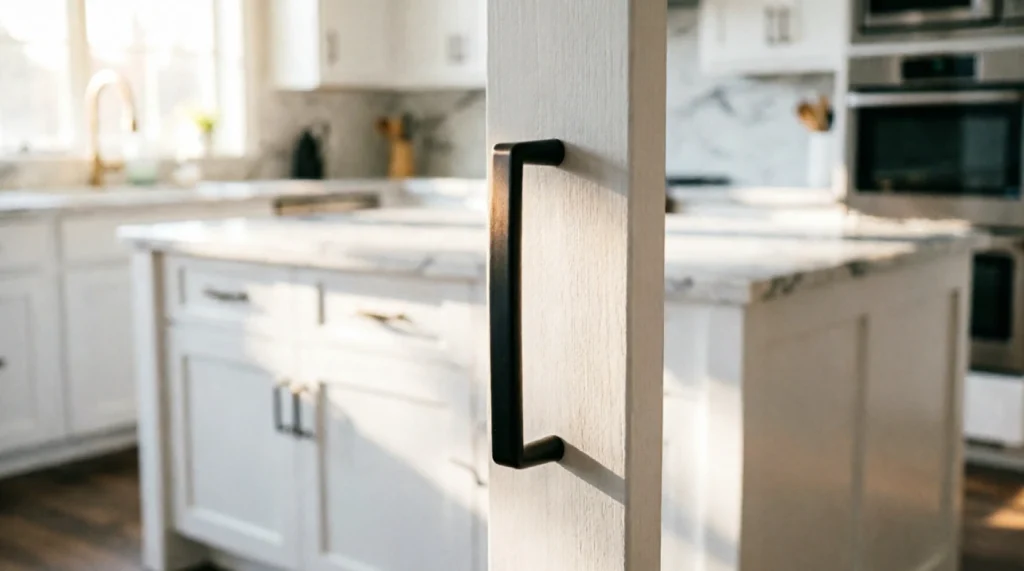
The Aftermath: Was It Worth It?
When I finished my kitchen, I just stood there admiring it. The matte black pulls popped against the white cabinets, and the room suddenly felt modern and deliberate. It cost me about $70 and one Saturday morning.
If your kitchen feels tired but a full renovation isn’t on the table, start here. Changing the hardware won’t fix layout issues, but it will give you a fresh perspective on the space you have. You might even fall in love with your cabinets again.
And if you mess up a hole or choose a finish you later dislike? It’s all fixable. Nothing here is permanent, which makes it one of the most forgiving DIY projects you can tackle.
So grab a screwdriver and pick out a few new knobs. That tiny change just might spark the kitchen update you’ve been craving.
More DIY Home Repair Guides
If the hardware swap gave you a taste for hands-on fixes, these beginner-friendly guides will help you tackle a few more corners of the home with confidence.
- Essential DIY Home Repairs for New Homeowners – A practical starter list of the most common repairs you’ll face in your first year.
- Plumbing Wisdom My Dad Taught Me – The simple, no-nonsense plumbing habits that have saved me hundreds over the years.
- How to Fix a Leaky Moen Kitchen Faucet – A step-by-step fix for a dripping Moen tap that you can finish before your morning coffee.
- Simple DIY Toilet Repair – From running toilets to strange sounds, this guide walks through the most common problems.
- Replace a Toilet Flapper in Minutes – One of the fastest plumbing wins you can pull off with just a screwdriver and a new flapper.
- The Tools You Actually Need for Home DIY – Stop buying gadgets you’ll never use; here’s the streamlined toolkit that covers 90% of home jobs.