I used to think a dripping faucet was just an annoyance—a little plink, plink, plink in the middle of the night. But when my Moen kitchen faucet started leaking again for the second time in four years, I knew it was more than that. It was wasting water, driving up my bill, and slowly staining the sink. So I rolled up my sleeves and decided to fix a leaky Moen kitchen faucet myself, once and for all.
If you’ve landed here, you’re probably dealing with the same slow drip. I want to save you the trial and error I went through. In this guide, I’ll walk you through the exact steps to fix a leaky Moen kitchen faucet, from identifying your model to putting everything back together—without needing to call a plumber. I’ve also included the mistakes I made so you can avoid them entirely.
This isn’t a generic plumbing article. I built it from real, hands‑on experience with that one specific cartridge‑style Moen faucet that seems to be in half the kitchens out there. Let’s get your faucet drip‑free again.
Before You Start: Identify Your Faucet and Get Free Parts
First, you need the right repair kit. Moen faucets come with a lifetime warranty against leaks. Therefore, the replacement cartridge and O‑rings you need will likely cost you nothing. However, you must know your faucet model to request the correct kit.
Open the cabinet under your sink and look for a small tag on the water supply lines. If you can’t find one, head to Moen’s “Identify My Product” tool and answer a few simple questions about the handle style and finish. The system will tell you the model number.
Once you have that, contact Moen customer service. Explain that your kitchen faucet is dripping, and they’ll ask for a photo of the faucet and maybe a description of the leak. I’ve done this twice, and both times they shipped a brand‑new cartridge and O‑ring kit within a week—no receipt needed.
Pro tip: The repair kit may come in multiple pieces. When I got mine, I almost threw away the small box that held the replacement O‑rings because they were tucked behind the spout packaging. Open everything and lay it out before you begin.
Tools You’ll Need
You don’t need a truckload of specialty gear. Here’s what you’ll want within arm’s reach before you start:
- A Phillips (+) screwdriver
- A flat‑head (–) screwdriver
- An adjustable wrench or pipe‑wrench pliers
- A set of Allen keys (often a 3/32” or 2.5 mm does the trick)
- The white plastic cartridge‑removal tool that Moen includes with your new cartridge
- A small container to hold screws and small parts
- Paper towels or an old towel for inevitable water drips
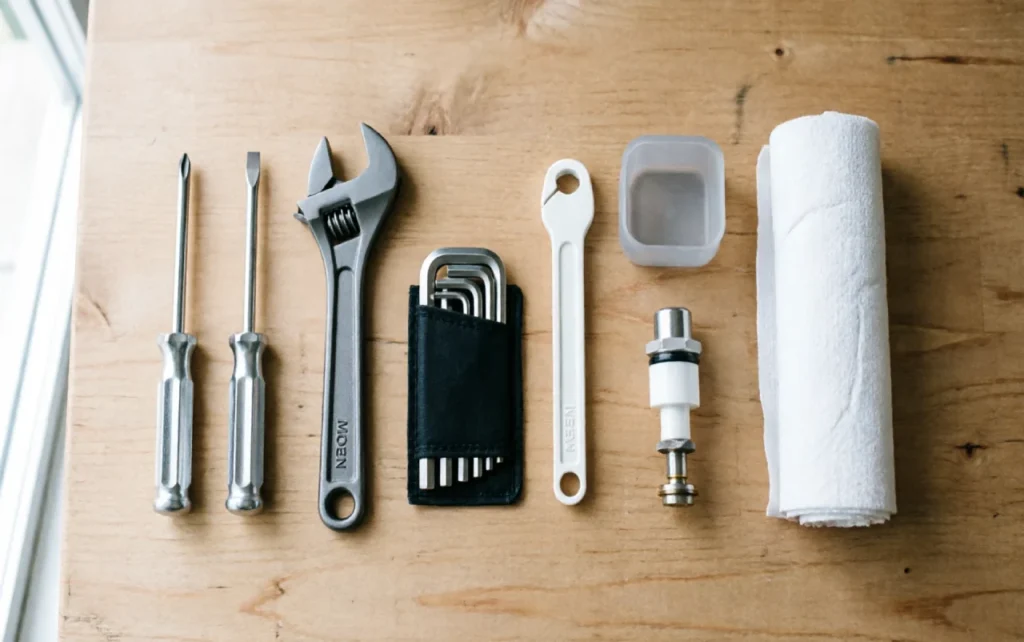
Everything you need to fix a leaky Moen kitchen faucet — most you already own.
The Allen key you need is sometimes even supplied in the repair kit, but I keep a full set handy just in case.
Step 1: Shut Off the Water Before You Start the Repair
Before you touch a single screw, reach under the sink and turn off both the hot and cold water supply valves. If your home uses older valves that don’t close completely, shut off the main water supply temporarily.
Even with the water off, the faucet spout and the cartridge will hold some leftover water. As soon as you start taking things apart, that water will find a way out. A folded towel on the sink base catches most of it and saves your back from drying a puddle later.
Step 2: Diagnose Your Leaky Moen Kitchen Faucet Correctly
This step is something I missed the first time. Not every leaky Moen faucet needs a full cartridge replacement.
Observe the faucet when it’s off. If water drips from the tip of the spout, the cartridge inside the handle is almost always the culprit. If you see water seeping out from the base of the spout where it meets the counter, you likely need just the O‑rings on the copper body—those are easier to swap and come in the same kit. If the handle itself feels loose or water leaks from the handle base, the internal handle mechanism seals may be worn.
For a drip from the spout tip (the most common scenario), you’ll replace the cartridge and the O‑rings. The following steps walk you through everything.
Step 3: Remove the Handle and Chrome Dome
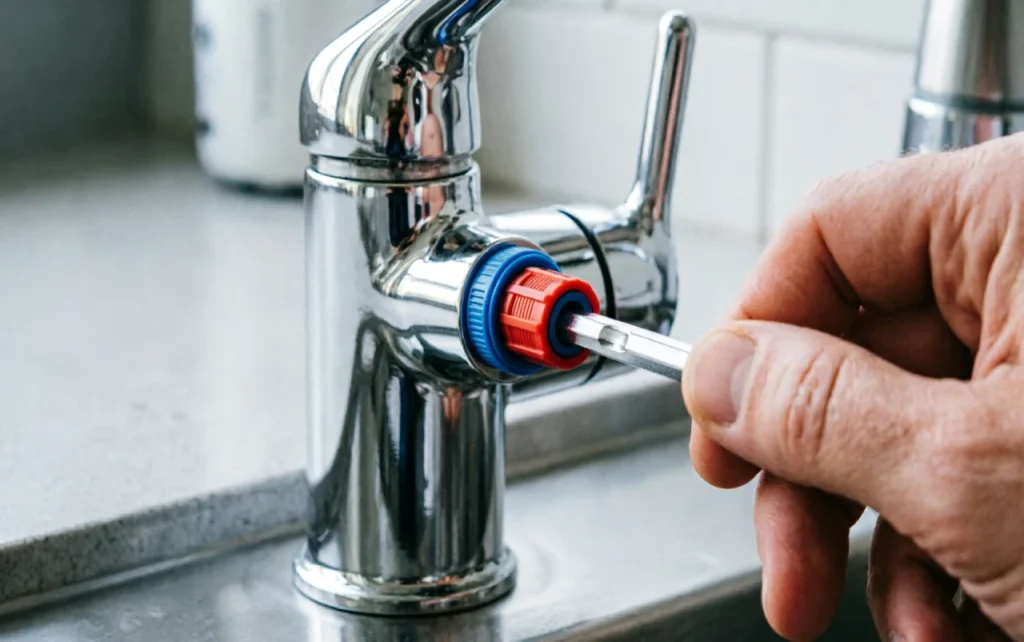
Look at the side of your faucet handle. You’ll see a small red‑and‑blue plastic plug. Flip it open with your fingernail or a flat‑head screwdriver. Then, inside the hole, you’ll find a hex‑head screw.
Insert the correct Allen key and turn it counter‑clockwise until the handle lifts off. The screw is long, so don’t worry if it takes a few seconds. Once the handle is off, the shiny chrome dome underneath simply slides up and away, revealing a black plastic sleeve.
Now, twist that black sleeve counter‑clockwise to unscrew it. You might be able to turn it by hand, but if it’s stubborn, use your adjustable wrench on the flat sides near the top. Be gentle—plastic can crack if you force it.
Step 4: Free the Handle Mechanism and “Restriction Ring”
Under the sleeve, you’ll see a metal pivoting piece that connects to the copper stem of the cartridge. A single Phillips screw holds it down, along with a small black plastic clip that wraps around the metal.
Remove that screw. The metal piece and clip will come off together. Before you set them aside, take a mental picture—or an actual one with your phone—of which way the metal arm is facing. If you put it back 180 degrees out, your handle will operate backward. Ask me how I know.
Next, lift off the small white “restriction ring” sitting on top. Notice the little raised tab on one side; that tab limits how far the handle turns. Remember which way the tab points so you can reassemble it correctly later.
Step 5: Take Off the Spout and Cartridge Clip
First, remove the small metal washer that sits on top of the cartridge carefully and keep it safe—it’s easy to lose.
Now, unscrew the larger dark sleeve that holds the spout down. This sleeve threads onto the faucet body and may need pliers to break free. Once you remove it, the entire spout lifts straight up and off the copper base. Congratulations: you’ve just exposed the cartridge.
At the top of the cartridge, you’ll see a thin metal retaining clip. Slide a flat‑head screwdriver under the clip and gently pry it upward until it slides out completely. Without this clip, you can pull the cartridge out.
Step 6: Replace the Cartridge and O‑Rings
Here’s where the white plastic removal tool from Moen shines. Slip its notched end over the top of the old cartridge and turn it back and forth. The cartridge isn’t threaded, but it tends to seize up over time. This twisting motion breaks the seal. Once loose, pull the cartridge straight up. Expect a little water, even if the valves are off.
Before you put the new cartridge in, replace the two black O‑rings on the copper base. Use a flat‑head screwdriver to gently lift the old rings off without scratching the metal. Then, apply the thick silicone grease that comes with your kit to the new O‑rings and slide them into the grooves. This lubrication helps the spout rotate smoothly and prevents future drips from the base.
Now, take your new cartridge and align it so the flat sides on its stem match the orientation of the old one (the plastic tool helps with this alignment). Push it in firmly until it’s seated. Slide the retaining clip back into place. You’ll hear a satisfying little click.
Step 7: Reassemble in Reverse Order
Putting everything back is simply the disassembly steps run backward. Here’s a quick checklist:
- Slide the spout back over the copper base.
- Reinstall the metal washer on top of the cartridge.
- Screw on the dark sleeve that holds the spout down. Ensure the white bearing ring inside it is oriented correctly—flat side down, thin edge up.
- Place the white restriction ring back with its tab pointing the original direction.
- Attach the metal handle mechanism and clip with the Phillips screw, checking that the metal arm faces the right way.
- Twist the black plastic sleeve back on and tighten by hand.
- Slide the chrome dome down over the sleeve.
- Set the handle in place, tighten the Allen screw, and close the red‑and‑blue plug.
Take your time. Nothing is under tension here, so if something doesn’t feel right, stop and double‑check.
Step 8: Test and Troubleshoot Your Fixed Faucet
Turn the water supply back on slowly. Lift the handle and let the water run for a few seconds to flush any air. Then shut it off completely.
Watch the spout. No drips? You nailed it.
If you still see a small drip from the tip, the cartridge may not be fully seated, or the alignment is slightly off. Turn the water back off, remove the handle and dome, and make sure the retaining clip is fully inserted and the cartridge stem is rotated correctly.
A drip from the base of the spout means the O‑rings might have twisted during installation. Pop the spout off and check them. It’s an easy fix.
Keep Your Faucet Leak‑Free Longer
Moen cartridges are built to last, but hard water and debris can shorten their life. Every 6 to 12 months, turn off the water, remove the handle and cartridge, and rinse the cartridge with white vinegar to dissolve mineral buildup. Wipe down the inside of the faucet body with a clean cloth, reapply a tiny bit of silicone grease to the O‑rings, and put it all back. This simple cleaning takes less than twenty minutes and has dramatically extended the time between repairs in my own kitchen. It’s one of those tricks my plumber dad passed down — you can read more of his practical advice here.
If you want to learn more about preventing kitchen sink leaks, read our guide on basic kitchen plumbing maintenance.
Frequently Asked Questions
How do I know if my Moen faucet uses a 1225 or 1255 cartridge?
Most single‑handle Moen kitchen faucets made before 2010 use the 1225 cartridge. Newer models with the Duralast™ system use the 1255. When in doubt, pull the cartridge and look for the number stamped on the side, or use Moen’s online identification tool.
Can I use a universal cartridge instead of a genuine Moen part?
I don’t recommend it. Aftermarket cartridges often lack the exact tolerances of Moen’s parts, which can lead to early failure or a stiff handle. Since Moen provides genuine parts for free under warranty, there’s no reason to compromise.
What if my faucet only drips after I turn the water off?
This usually indicates residual pressure in the line or a cartridge that isn’t sealing fully. Try replacing the cartridge and O‑rings as outlined above. If the problem persists, your water pressure might be high enough to require a pressure‑reducing valve, but that’s a job for a licensed plumber.
How can I temporarily stop a leak while waiting for parts?
Tightening the handle slightly (don’t force it) can sometimes slow a drip. You can also turn off the isolation valves under the sink when the faucet isn’t in use to prevent water waste. These are stopgaps, not fixes.
Final Thoughts on Fixing Your Leaky Moen Kitchen Faucet
Fixing a leaky Moen kitchen faucet doesn’t demand a plumber’s license—just a bit of patience and the willingness to get your hands slightly wet. I’ve done this repair twice now, and each time I’m reminded that it’s 90% confidence and 10% turning screws.
If you follow the steps in order, respect the orientation of those tiny rings and clips, and use the free parts Moen gladly sends you, you’ll have a silent, drip‑free faucet for years to come. And when the next leak appears, you’ll already be the person your friends and family call for help.